How to enable VT in AMD BIOS?
How to enable AMD-V
- Press the F2 key at the startup BIOS setup.
- Press the right arrow key to go to the "advanced" tab.
- Select virtualization, and then press enter.
- Select enabled, and press enter.
- Press the F10 key, and select yes.
- Press enter to save changes.
- Reboot into Windows.
How to fix AMD-V is disabled in the BIOS?
In the BIOS interface, navigate to Advanced > CPU Configuration. In this tab, make sure the AMD-V or AMD SVM is enabled. The specific path and the virtualization technology name may vary depending on different BIOS versions. Press F10 to save the changes and then exit from BIOS.
How to tell if AMD-V is enabled?
Method 1 – Using task Manager If you have Windows 10 or Windows 8 operating system, the easiest way to check is by opening up Task Manager->Performance Tab. You should see Virtualization as shown in the below screenshot. If it is enabled, it means that your CPU supports Virtualization and is currently enabled in BIOS.
How to activate AMD virtual boot settings?
Procedure
- From the System Utilities screen, select System Configuration > BIOS/Platform Configuration (RBSU) > Virtualization Options > AMD Virtualization Technology.
- Select one of the following: Enabled. Disabled.
- Save your setting.
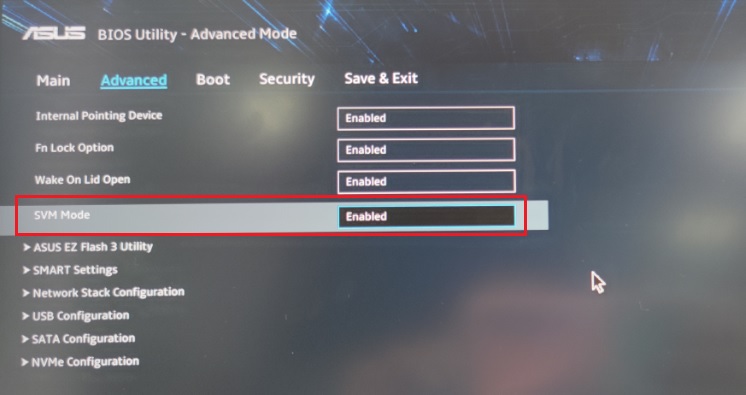
In BIOS, it is named SVM(Secure Virtual Machine) mode, you can select enabled or disabled as below shown. (The default of this item is Enabled in BIOS)